ASP.NET 5 Docker language stack with Kestrel

This blog post presents a Docker Language Stack for creating and running ASP.NET 5 (née vNext) apps. It’s based on my work last week to run ASP.NET 5 on Google Container Engine.

I the interim, the ASP.NET team has released their own Docker image. It’s not really up to spec for being a Docker language stack though, so I forked it, added what was missing and published it on Docker Hub.

Other people already sent PRs to add onbuild support to the ASP.NET repo, but there’s apparently some uncertainty about how ASP.NET 5 apps are going to get built, so they’re holding off on merging. I hope that eventually the work presented here will get folded into the official repo, just like it happened with the Mono stack I created a month ago. That’s the base for what’s now the official Mono Docker language stack, which, incidentally, is what the ASP.NET docker image derives from!

How to use

Using the onbuild image is pretty simple. To run HelloWeb sample, clone that repo and add this Dockerfile in the HelloWeb dir, next to the project.json:

FROM friism/aspnet:1.0.0-beta1-onbuild
EXPOSE 5004

Now build the image:

docker build -t my-app .

And finally run the app, exposing the site on port 80 on your local machine:

docker run -t -p 80:5004 my-app

Note that the -t option is currently required when invoking docker run. This is because there’s some sort of bug in Kestrel that requires the process to have a functional tty to write to – without a tty, Kestrel hangs on start.

Google Container Engine for Dummies

Last week, Google launched an alpha version of a new product called Google Container Engine (GKE). It’s a service that runs pre-packaged Docker images for you: You tell GKE about images you want to run (typically ones you’ve put in the Docker Registry, although there’s a also a hack to run private images) and how many instances you need. GKE will spin them up and make sure the right number is running at any given time.

The GKE Getting Started guide is long and complicated and has more JSON than you shake a stick at. I suspect that’s because the product is still alpha, and I hope the Google guys will improve both the CLI and web UIs. Anyway, below is a simpler guide showing how to stand up a stateless web site with just one Docker image type. I’m also including some analysis at the end of this post.

I’m using a Mono/ASP.NET vNext Docker image, but all you need to know is that it’s an image that exposes port 5004 and serves HTTP requests on that port. There’s nothing significant about port 5004 – if you want to try with an image that uses a different port, simply substitute as appropriate.

In the interest of brevity, the description below skips over many details. If you want more depth, then remember that GKE is Kubernetes-as-a-Service and check out the Kubernetes documentation and design docs.

Setup

  1. Go to the Google Developer Console and create a new project
  2. For that project, head into the “APIs” panel and make sure you have the “Google Container Engine API” enabled
  3. In the “Compute” menu section, select “Container Engine” and create yourself a new “Cluster”. A cluster size of 1 and a small instance is fine for testing. This guide assumes cluster name “test-cluster” and region “us-central1-a”.
  4. Install the CLI  and run gcloud config set project PROJECT_ID (PROJECT_ID is from step 1)

Running raw Pod

The simplest (and not recommended) way to get something up and running is to start a Pod and connect to it directly with HTTP. This is roughly equivalent to starting an AWS EC2 instance and connecting to its external IP.

First step is to create a JSON-file somewhere on your system, let’s call it pod.json:

{
  "id": "web",
  "kind": "Pod",
  "apiVersion": "v1beta1",
  "desiredState": {
    "manifest": {
      "version": "v1beta2",
      "containers": [
        {
          "name": "web",
          "image": "friism/aspnet-web-sample-web",
          "ports": [
            { "containerPort": 5004, "hostPort": 80 }
          ]
        }
      ]
    }
  },
  "labels": {
    "name": "web"
  }
}

What you should care about is the Docker image/repository getting run (friism/aspnet-web-sample-web) and the port mapping (the equivalent of docker run -p 80:5004). With that, we can tell GKE to start a pod for us:

$ gcloud preview container pods --cluster-name test-cluster --zone us-central1-a \
    create web --config-file=/path/to/pod.json
...
ID                  Image(s)                       Host                Labels              Status
----------          ----------                     ----------          ----------          ----------
web                 friism/aspnet-web-sample-web   <unassigned>        name=web            Waiting

All the stuff before “create” is boilerplate and the rest is saying that we’re requesting a pod named “web” as specified in the JSON file.

Pods take a while to get going, probably because the Docker image has to be downloaded from Docker Hub. While it’s starting (and after), you can SSH into the instance that’s running your pod to see how it’s doing, eg. by running sudo docker ps. This is the SSH incantation:

$ gcloud compute ssh --zone us-central1-a k8s-test-cluster-node-1

The instances are named k8s-<cluster-name>-node-1 and you can see them listed in the Web UI or with gcloud compute instances list. Wait for the pod to change status to “Running”:

$ gcloud preview container pods --cluster-name test-cluster --zone us-central1-a list
ID                  Image(s)                       Host                              Labels              Status
----------          ----------                     ----------                        ----------          ----------
web                 friism/aspnet-web-sample-web   k8s-<..>.internal/146.148.66.67   name=web            Running

The final step is to open up for HTTP traffic to the Pod. This setting is available in the Web UI for the instance (eg. k8s-test-cluster-node-1). Also check that the network settings for the instance allow for TCP traffic on port 80.


And with that, your site should be responding on the external ephemeral IP address of the host running the pod.

As mentioned in the introduction, this is not a production setup. The Kubernetes service running the pod will do process management and restart Docker containers that die for any reason (to test this, try ssh’ing into your instance and docker-kill the container that’s running your site – a new one will quickly pop up). But your site will go down in case there’s a problem with the pod, for example. Read on for details on how to extend the setup to cover that failure mode.

Adding Replication Controller and Service

In this section, we’re going to get rid of the pod-only setup above and replace with a replication controller and a service fronted by a loadbalancer. If you’ve been following along, delete the pod created above to start with a clean slate (you can also start with a fresh cluster).

First step is to create a replication controller. You tell a replication controller what and how many pods you want running, and the controller then tries to make sure the correct formation is running at any given time. Here’s controller.json for our simple use case:

{
  "id": "web",
  "kind": "ReplicationController",
  "apiVersion": "v1beta1",
  "desiredState": {
    "replicas": 1,
    "replicaSelector": {"name": "web"},
    "podTemplate": {
      "desiredState": {
         "manifest": {
           "version": "v1beta1",
           "id": "frontendController",
           "containers": [{
             "name": "web",
             "image": "friism/aspnet-web-sample-mvc",
             "ports": [{"containerPort": 5004, "hostPort": 80 }]
           }]
         }
       },
      "labels": { "name": "web" }
      }},
  "labels": {"name": "web"}
}

Notice how it’s similar to the pod configuration, except we’re specifying how many pod replicas the controller should try to have running. Create the controller:

$ gcloud preview container replicationcontrollers --cluster-name test-cluster \
    create --zone us-central1-a --config-file /path/to/controller.json
...
ID                  Image(s)                       Selector            Replicas
----------          ----------                     ----------          ----------
web                 friism/aspnet-web-sample-mvc   name=web            1

You can now query and see the controller spinning up the pods you requested. As above, this might take a while.

Now, let’s get a GKE service going. While individual pods come and go, services are permanent and define how pods of a specific kind can be accessed. Here’s service.json that’ll define how to access the pods that our controller is running:

{
  "id": "myapp",
  "selector": {
    "app": "web"
  },
  "containerPort": 80,
  "protocol": "TCP",
  "port": 80,
  "createExternalLoadBalancer": true
}

The important parts are selector which specifies that this service is about the pods labelled web above, and createExternalLoadBalancer which gets us a loadbalancer that we can use to access our site (instead of accessing the raw ephemeral node IP). Create the service:

$ gcloud preview container services --cluster-name test-cluster--zone us-central1-a create --config-file=/path/to/service.json
...
ID                  Labels              Selector            Port
----------          ----------          ----------          ----------
myapp                                   app=web             80

At this point, you can go find your loadbalancer IP in the Web UI, it’s under Compute Engine -> Network load balancing. To actually see my site, I still had to tick the “Enable HTTP traffic” boxes for the Compute Engine node running the pod – I’m unsure whether that’s a bug or me being impatient. The loadbalancer IP is permanent and you can safely create DNS records and such pointing to it.

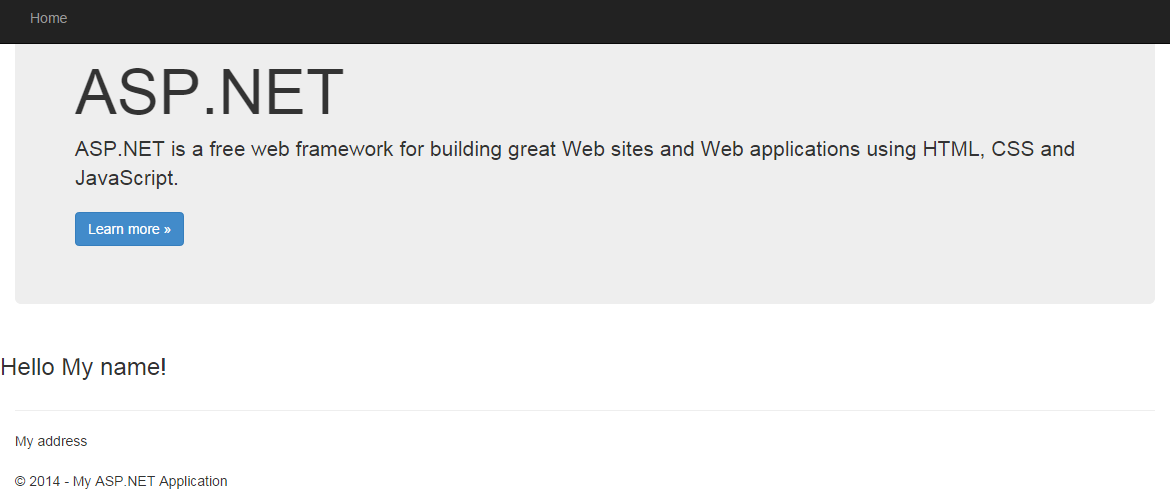
That’s it! Our stateless web app is now running on Google Container Engine. I don’t think the default Bootstrap ASP.NET MVC template has ever been such a welcome sight.

Analysis

Google Container Engine is still in alpha, so one shouldn’t draw any conclusions about the end-product yet (also note that I work for Heroku and we’re in the same space). Below are a few notes though.

Google Container Engine is “Kubernetes-as-a-Service”, and Kubernetes is currently exposed without any filter. Kubernetes is designed based on Google’s experience running containers at scale, and it may be that Kubernetes is (or is going to be) the best way to do that. It also has a huge mental model however – just look at all the stuff we had to do to launch and run a simple stateless web app. And while the abstractions (pods, replication controllers, services) may make sense for the operator of a fleet of containers, I don’t think they map well to the mental model of a developer just wanting to run code or Docker containers.

Also, even with all the work we did above, we’re not actually left with a managed and resilient capital-S Service. What Google did for us when the cluster was created, was simply to spin up a set of machines running Kubernetes. It’s still on you to make sure Kubernetes is running smoothly on those machines. As an example, a GKE cluster currently only has one Master node. This is the Kubernetes control plane node that accepts API input and schedules pods on the GCE instances that are Kubernetes minions. As far as I can determine, if that node dies, then pods will no longer get scheduled and re-started on your cluster. I suspect Google will add options for more fault-tolerant setups in the future, but it’s going to be interesting to see what operator-responsibility the consumer of GKE will have to take on vs. what Google will operate for you as a Service.

Mono Docker language stack

I couple weeks ago, Docker announced official pre-built Docker images for a bunch of popular programming languages. Each stack generally consists of two Dockerfiles: a base Dockerfile that installs system dependencies required for that language to run, and an onbuild Dockerfile that uses ONBUILD instructions to transform app source code into a runnable Docker image. As an example of the latter, the Ruby onbuild Dockerfile runs bundle install to install libraries specified in an app’s Gemfile.

Managing system dependencies and composing apps from source code is very similar to what we do with Stacks and Buildpacks at Heroku. To better understand the Docker approach, I created a language stack for Mono, the open source implementation of Microsoft’s .NET Framework.

UPDATE: There’s now a proper official Docker/Mono language stack, I recommend using that.

How to use

A working Docker installation is required for this section.

To turn a .NET app into a runnable Docker image, first add a Dockerfile to your app source root. The sample below assumes a simple console app with an output executable name of TestingConsoleApp.exe:

FROM friism/mono:3.10.0-onbuild
CMD [ "mono", "./TestingConsoleApp.exe" ]

Now build the image:

docker build -t my-app .

The friism/mono images are available in the public Docker Registry and your Docker client will fetch them from there. Docker will then execute the onbuild instructions to restore NuGet packages required by the app and use xbuild (the Mono equivalent of msbuild) to compile source code into executables and libraries.

The Docker image with your app is now ready to run:

docker run my-app

If you don’t have an app to test with, you can experiment with this console test app.

Notes

The way Docker languages stacks are split into a base image (that declares system dependencies) and an onbuild Dockerfile (that composes the actual app to be run) is perfect. It allows each language to get just the system libraries and dependencies needed. In contrast, Heroku has only one stack image (in several versions, reflecting underlying Linux distribution versions) that all language buildpacks share. That stack is at once both too thick and too thin: It includes a broad assortment of libraries to make supported languages work, but most buildpack maintainers still have to hand-build dependencies and vendor in the binaries when apps are built.

Docker has no notion of a cache for ONBUILD commands whereas the Heroku buildpack API has a cache interface. No caching makes the Docker stack maintainer’s life easier, but it also makes builds much slower than what’s possible on Heroku. For example, Heroku buildpacks can cache the result of running bundle install (in the case of Ruby) or nuget restore (for Mono), greatly speeding up builds after the first one.

Versioning is another interesting difference. Heroku buildpacks bake support for all supported language versions into a single monolithic release. What language version to use is generally specified by the app being built in a requirements.txt (or similar) file and the buildpack uses that to install the correct packages.

Docker language stacks, on the other hand, support versioning with version tags. The app chooses what stack version to use with the FROM instruction in the Dockerfile that’s added to the app. Stack versions map to versions of the underlying language or framework (eg. FROM python:3-onbuild gets you Python 3). This approach lets the Python stack, for example, compile Python 2 and 3 apps in different ways without having a bunch of branching logic in the onbuild Dockerfile. On the other hand, pushing an update to all Python stack versions becomes more work because the tags have to be updated individually. There are tradeoffs in both the Docker and Heroku buildpack approaches, I don’t know which is best.

Docker maintains a free, automated build service that churns out hosted Docker images for everyone to use. For my Mono stack, Docker Hub pulls updates from the GitHub repo with the Dockerfiles and builds the relevant tags into images. This is very convenient for stack maintainers. Heroku has no hosted service for building buildpack binaries, although I have documented a (Docker-based) approach to scripting this work.

(Note that, while Heroku buildpacks are wildly successful, it’s an older standard that predates Docker by many years. If it seems like Docker has gotten more things right, it’s probably because that project was informed by Heroku’s experience and by the passage of time).

Finally, and unrelated to Docker and Heroku, the Mono Project now has an APT package repository. This is pretty awesome, and I sincerely hope that the days of having to compile Mono from source are behind us. I don’t know if the repo is quite stable yet (I had to download a key without using SSL, the mono-devel package is versioned 3.10.0-0xamarin1 and the package fails to declare a dependency on udev), but it made the Mono Docker stack image a lot simpler. Check out the diff going from 3.8.0 (compiled from source) to 3.10.0 (installed from APT repo).

Running .NET apps on Docker

This blog post covers running simple .NET apps in Docker lightweight containers using Mono. I run Docker in a Vagrant/VirtualBox VM on Windows. This works great and is fast. Installation instructions are available on the Docker site.

Building the base image

First order of business is to create a Docker image that has Mono installed. We will use this as the base image for containers that actually run apps. To get the most recent Mono version (3.2.6 at the time of writing) I use packages created by Timotheus Pokorra installed on a Ubuntu 12.04 LTS Docker image. Here’s the Dockerfile for that:

FROM ubuntu:12.04
MAINTAINER friism

RUN apt-get -y -q install wget
RUN wget -q http://download.opensuse.org/repositories/home:tpokorra:mono/xUbuntu_12.04/Release.key -O- | apt-key add -
RUN apt-get remove -y --auto-remove wget
RUN sh -c "echo 'deb http://download.opensuse.org/repositories/home:/tpokorra:/mono/xUbuntu_12.04/ /' >> /etc/apt/sources.list.d/mono-opt.list"
RUN apt-get -q update
RUN apt-get -y -q install mono-opt

Here’s what’s going on:

  1. Install wget
  2. Add repository key to apt-get
  3. remove wget
  4. Add openSUSE repository to sources list
  5. Install Mono from there

At first I did all of the above in one command since these steps represent the single logical step of installing Mono and it seems like they should be just one commit. Nobody will be interested in the commit after wget was installed, for example. I ended up splitting it up into separate RUN commands since that’s what other people seem to do.
With that Dockerfile, we can build an image:

$ docker build -t friism/mono .

We can then run a container using the generated image and check our Mono installation:

vagrant@precise64:~/mono$ docker run -i -t friism/mono bash
root@0bdca65e6e8e:/# /opt/mono/bin/mono --version
Mono JIT compiler version 3.2.6 (tarball Sat Jan 18 16:48:05 UTC 2014)

Note that Mono is installed in /opt and that it works!

Running a console app

First, we’ll deploy a very simple console app:

using System;

namespace HelloWorld
{
	public class Program
	{
		static void Main(string[] args)
		{
			Console.WriteLine("Hello World");
		}
	}
}

For the purpose of this example, we’ll pre-build apps using the VS command prompt and msbuild and then add the output to the container:

msbuild /property:OutDir=C:\tmp\helloworld HelloWorld.sln

Alternatively, we could have invoked xbuild or gmcs from within the container.

The Dockerfile for the container to run the app is extremely simple:

FROM friism/mono
MAINTAINER friism

ADD app/ .
CMD /opt/mono/bin/mono `ls *.exe | head -1`

Note that it relies on the friism/mono image created above. It also expects the compiled app to be in the /app folder, so:

$ ls app
HelloWorld.exe

The CMD will simply use mono to run the first executable found in the build output. Let’s build and run it:

$ docker build -t friism/helloworld-container .
...
$ docker run friism/helloworld-container
Hello World

It worked!

Web app

Running a self-hosting OWIN web app is only slightly more work. For this example I used the sample code from the OWIN/Katana-on-Heroku post.

$ ls app/
HelloWorldWeb.exe  Microsoft.Owin.Diagnostics.dll  Microsoft.Owin.dll  Microsoft.Owin.Host.HttpListener.dll  Microsoft.Owin.Hosting.dll  Owin.dll

The Dockerfile for this exposes port 5000 from the container, and CMD is used to start the web app and specify port 5000 to listen on:

FROM friism/mono
MAINTAINER friism

ADD app/ .
EXPOSE 5000
CMD ["/opt/mono/bin/mono", "HelloWorldWeb.exe", "5000"]

We start the container and map port 5000 to port 80 on the machine running Docker:

$ docker run -p 80:5000 -t friism/mono-hello-world-web

And with that we can visit the OWIN sample site on http://localhost/.

If you’re a .NET developer this post will hopefully have helped you place Docker in the context of your everyday work. If you’re interested in more ideas on how to use Docker to deploy apps, check out this Automated deployment with Docker – lessons learnt post.